A Quick Microsoft Access 2000 Tutorial
By Charles W. Neville, © Charles W. Neville, March 2001
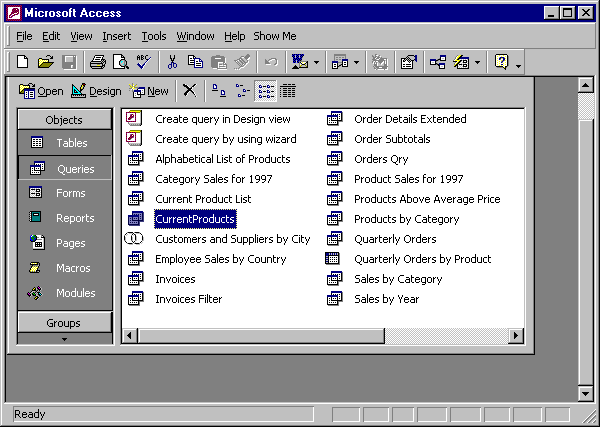
The CurrentProducts query that you developed and saved in the last chapter only displays the ProductID, ProductName, and CategoryID fields of the products which have not been discontinued. These fields, and the Discontinued field, are all part of the Products table, so you only needed that one table in the design of the query.
But suppose you wanted to change the query so it would also present the name of the supplier of each product, and the suppliers telephone number. The supplier name is available in the Products table in the SupplierID field. (Strictly speaking, this isn't true; instead the numerical SupplierID is available. But the designers of the Northwind sample database made it appear as though the supplier name is available.) However, the supplier's telephone number is NOT available in the Products table, so we have to use a second table, the Suppliers table, where it is available.
Let us convert the CurrentProducts query to a multi-table query.
Step 1. Be sure the Queries tab is selected and visible in the database window. Open the CurrentProducts query in design view by selecting it and then clicking on the Design button at the top of the database window.
If all goes well, you will see the the familiar CurrentProducts query you designed, tested, and saved in the last chapter.

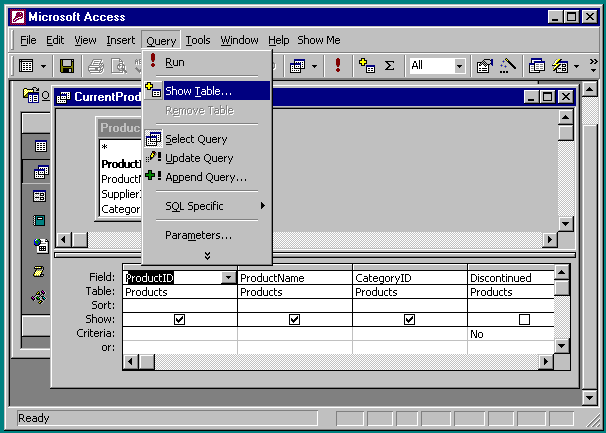
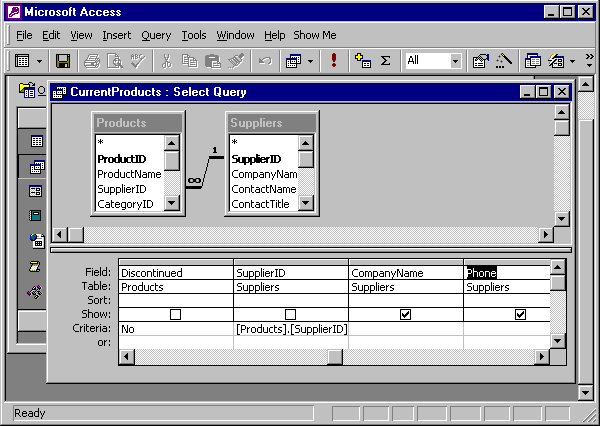
Step 2. Click on the Query menu and then click Show Table to display the Show Table dialog box.
Step 3. When the Show Table dialog box appears, select the Suppliers table and press the Add button.
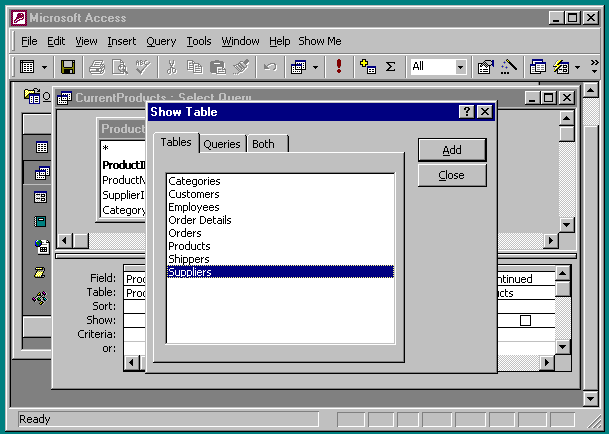
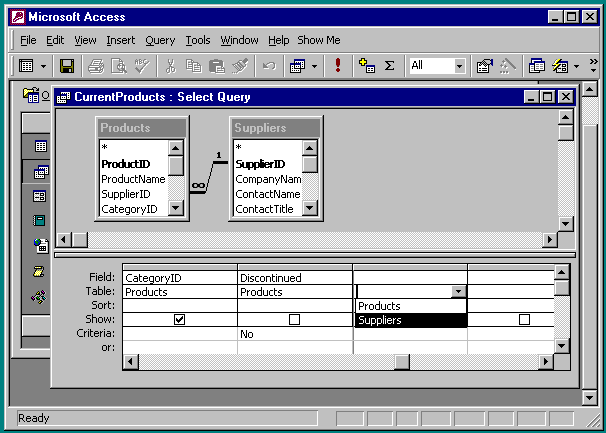
Step 4. Close the Show Table dialog box by pressing the Close button. If all goes well, you will see both the Products table and the Suppliers table in the design view window.
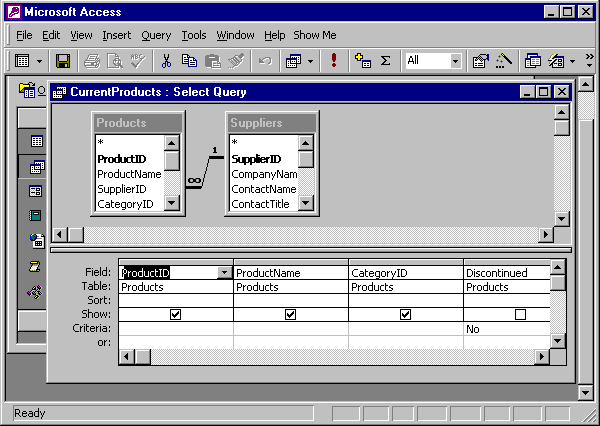
The line running from Products to Suppliers denotes a many-one relationship between the two tables. Microsoft Access 2000 incorporates relationships as objects separate from tables, so you can design directly from Entity-Relationship diagrams. Access also uses relationships to automatically generate joins between tables. In this chapter of the tutorial, you can safely ignore relationships.
Step 5. Be sure the cursor is in the box in the Tables row immediately to the right of the Discontinued column. Press the  button in the box to display the table choices. Select Suppliers.
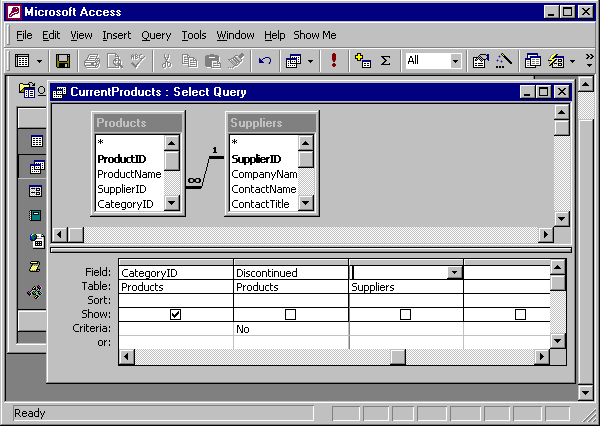
Step 6. Click on the box of the Field row just above where you selected the Suppliers table, so you can choose the proper field from the Suppliers table.
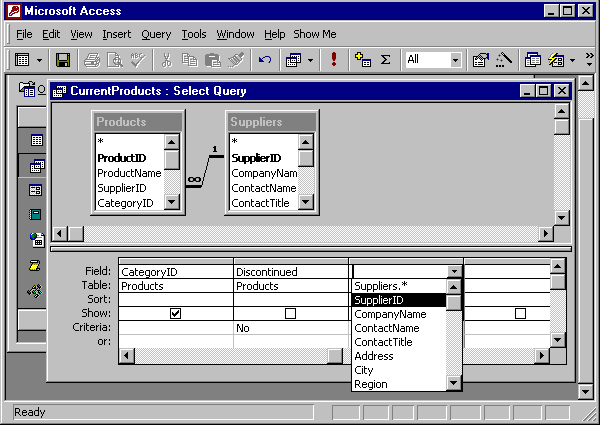
Step 7. Press the button again to display the field choices for the Suppliers table. Select SupplierID.
Step 8. Enter Products.SupplierID in the box in the Criteria row and the Suppliers column. This will guarantee that Suppliers.SupplierID = Products.SupplierID, so that you will match up the correct product with the correct supplier.
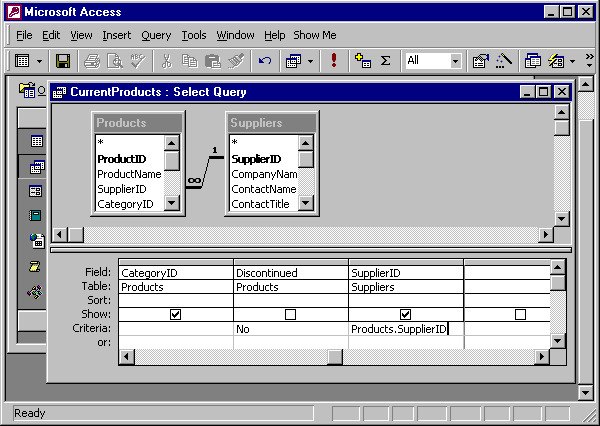
Note. Strictly speaking, this is not necessary because of the Microsoft Access many-one relationship between Products and Suppliers. But we have included it for clarity. (Remember, we are ignoring Access relationships in this chapter.)
Step 9. Click the  check box in the Suppliers column to uncheck it.

Step 10. Repeat steps 5 through 7 in the blank column immediately to the right of the Suppliers column you just completed. Select the Suppliers table and the CompanyName field. Be sure you leave the check box checked, and be sure you leave the box in the Criteria row blank.
Step 11. Repeat this in the next blank column immediately to the right of the Suppliers column you just completed. Select the Suppliers table and the Phone field. This completes the multi-table query.
Remember, you should always test a new query by running it.
Step 1. Run the completed query.
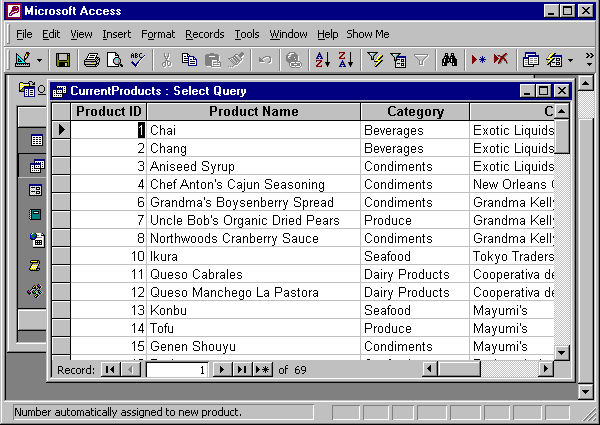
Carefully examine the table of results. It appears to be correct, so the completed query appears to be correct.
Save the completed multi-column query for future use as CurrentProductsAndSuppliers. (The period is there for grammatical reasons and is not part of the name.) Be sure you use Save As rather than Save from the File menu, because Save doesn't allow you rename the query.
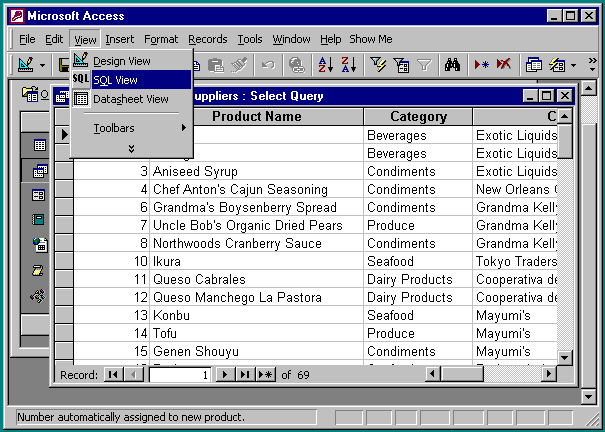
Let us look at the SQL behind the query by displaying the query in SQL View.
Step 1. Click on the View menu, and then click SQL View.
If all goes well, the SQL View display of the query will look like
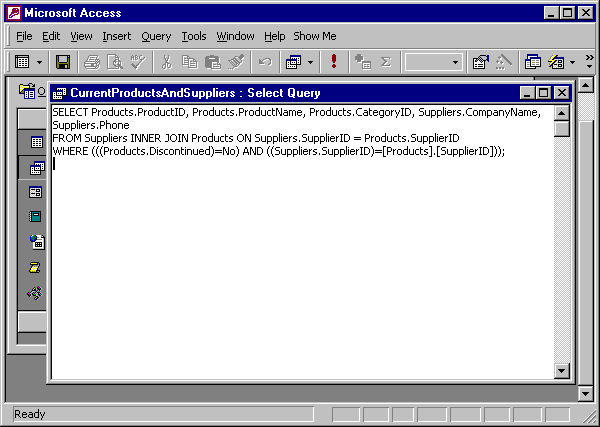
Note. The INNER JOIN appears in the SQL because of the Access many-one relationship between the Products table and the Suppliers table. The query will work correctly without the INNER JOIN, as we shall see in the next chapter.
The next thing to do is to study SQL Queries